How I Made Avery's Yellow Fairy Costume


Ok, wrong season to be blogging about a Halloween costume. But we’ve been busy, winter flew by, and somehow it’s nearly spring. And what’s more springy than a butter-yellow, nature-inspired fairy costume? Bam! Off-season blog post justified.
Since she learned to talk, Avery made it clear that she was all about yellow, so it made sense that her third Halloween costume would be an variation on that theme. So I raided my stash for all of the yellow remnants I could find. Fortunately I bought a lot of yellow fabric back in my hoarding days, including a beautiful piece of marigold silk from The Fabric Store, some leftover cotton gauze from my Stevie blouse, and some scraps I had leftover from other projects. I only had to purchase some additional fabric for the wings, which required something stiff and gauzy. Here’s a recap of my process:
Inventory, plan, sketch
As I mentioned above, I took stock of the fabric I already had to avoid buying too much more. I then sketched out plans for the skirt (self-drafted and fairly simple) and determined that I would need to purchase a pattern for the top. I decided to attach the wings to the top/ vest so that I wouldn’t have to add additional straps (which I thought would disrupt the lines and look a little funky), so had to create a sturdy, heavier top to accommodate them.
I took a little trip to Joann’s and settled on Simplicity 1786 — a simple vest that I could easily alter to include Velcro closure. For the wings, I planned to use a technique I learned making costumes in high school theater: basically, a big wad of gauzy synthetic shaped into four wing-shaped bows and supported by light jewelry wire.

Prepare and Cut the Fabric
For the skirt, I used cardstock to create a simple template, and cut out about fifteen “petals,” alternating between leftover rayon and marigold silk that I found at The Fabric Store a few years back. I wanted the rayon to match the silk a bit more closely, so I used turmeric to dye both fabrics and get them a little closer in tone. I’m not a natural dye expert by any stretch, but I found that turmeric tea + extra powdered turmeric + hot water, soaked for about 15 minutes and rinsed, worked well. I used a serger to finish each petal before dying them, so the thread ended up matching, too.
I decided to line the vest instead of using bias tape. This of course made the process more complicated and required cutting double pieces (cotton gauze and rayon), but it made the final piece sturdy enough to balance the wings that would be attached later.


Sew and ASSEMBLE
The vest was fairly easy to assemble, but the skirt took a little more finessing. After attaching each petal to the waste band, I folded and inserted the elastic, but boy howdy that took about 45 minutes (I despise inserting elastic—I still haven’t figured out how to do it efficiently).
I’m not sure how to describe the wing-making process (I probably should have made a video), but basically for each wing I folded a large rectangle of fabric, inserted a string of medium-weight jewelry wire at the fold, then molded it into a leaf shape cinched at the base. Once all four were complete, I attached them at the back center of the vest, covered with a small circle of the cotton gauze, then finished with marigold embroidery thread (see pictures below).
I used fabric scraps, naturally molted feathers, and a single seashell to created the hairpiece, which I held together with embroidery thread and a hot glue gun.
All in all, it turned out pretty epic, and Avery was the happiest (and possibly only) little yellow fairy in town.


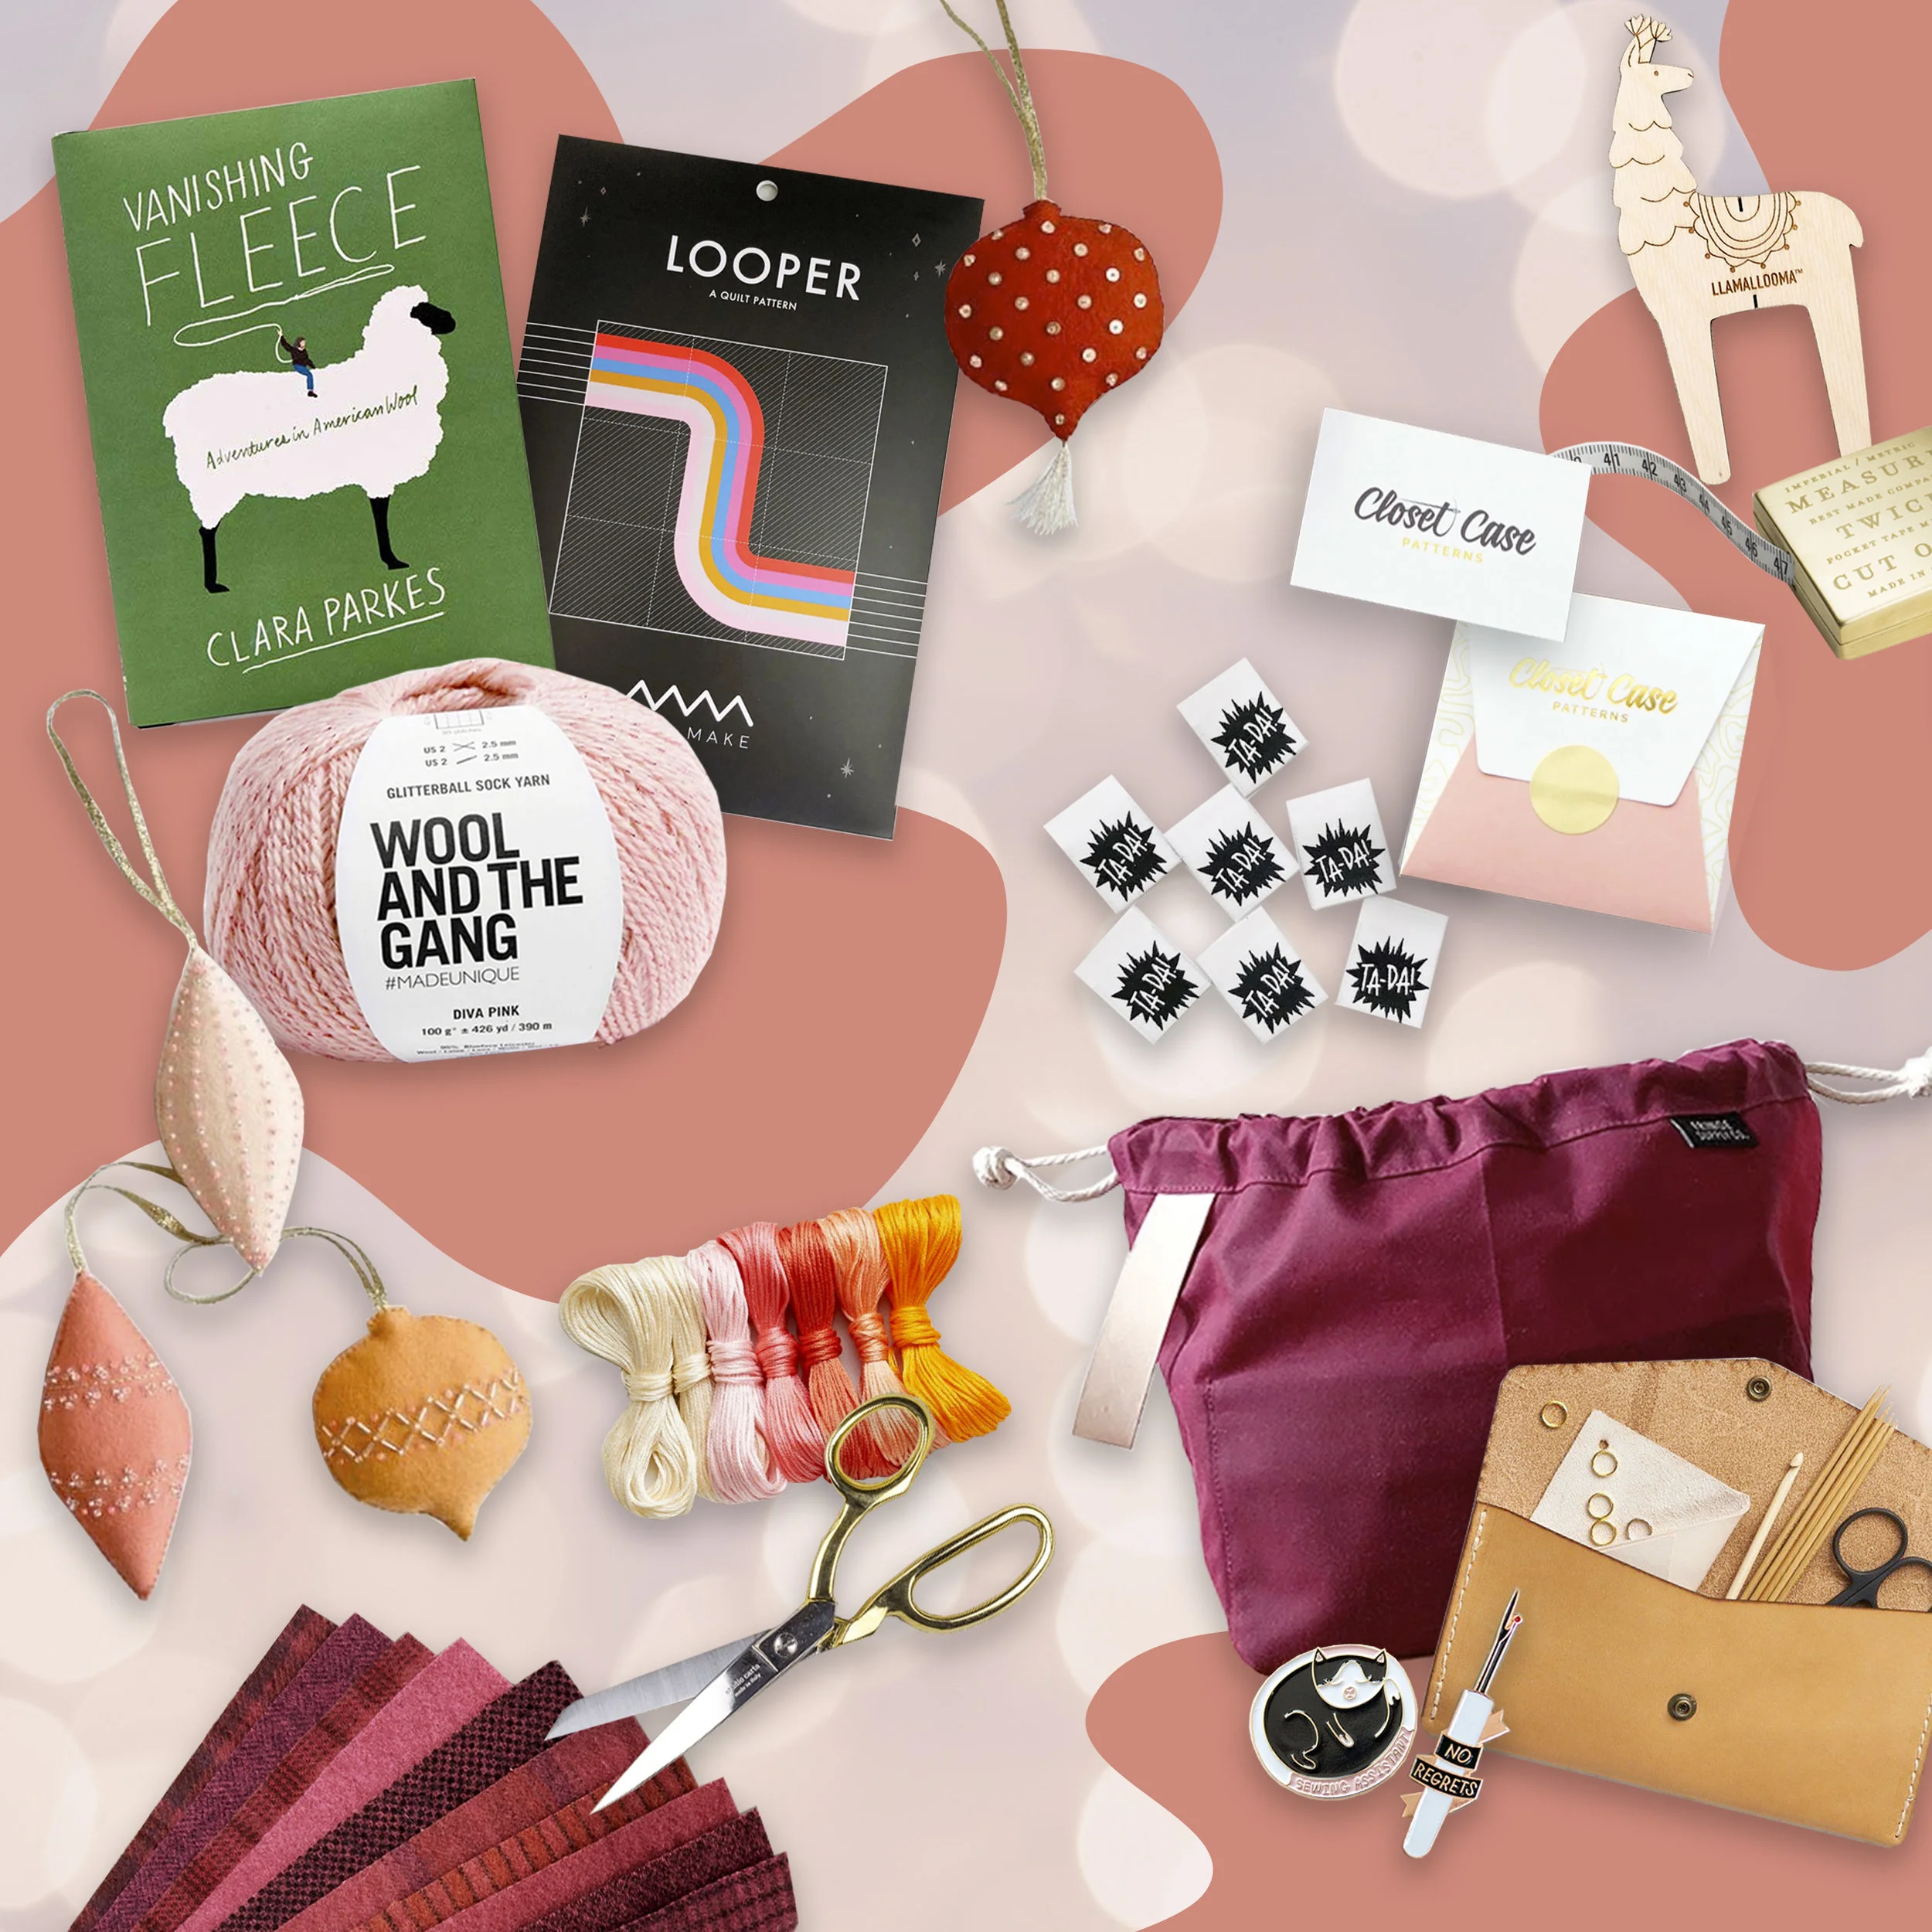
Sustainable Gifts for People Who Sew, Knit, and Craft
This list of list slow-made, sustainable, indie-focused holiday picks is sure to get your crafty friend or loved one thinking, organizing, and creating.

It’s no secret that I love to make stuff and that I’m a giant sentimental nerd when it comes to the holidays (having a kid has only exacerbated the problem). But I do try to be conscientious about the impact my crafting and holiday-ing has on people and the planet. As the sewing community becomes more and more focused on sustainability, it’s likely that the maker in your life has similar concerns. So I put this list slow-made, sustainable, indie-focused holiday picks that are sure to get your crafty friend or loved one thinking, organizing, and creating.

Waxed canvas Field Bag by Fringe Supply Co.
$77.90 at A Verb for Keeping Warm
This sturdy durable bag features lots of storage, a vegetable-tanned leather carry loop, and cotton drawstring. Made in the USA from sturdy waxed cotton canvas, it’s a great solution for knitters and other makers frequently on the go.

Vanishing Fleece: Adventures in American Wool
$17.99 at Amazon
In her latest book, knitter and writer Clara Parks details her adventures transforming a 676-pound bale of fleece into saleable yarn, and the people and vanishing industry she discovered along the way. Great for the knitter in your life — or anyone who loves a good nonfiction read.
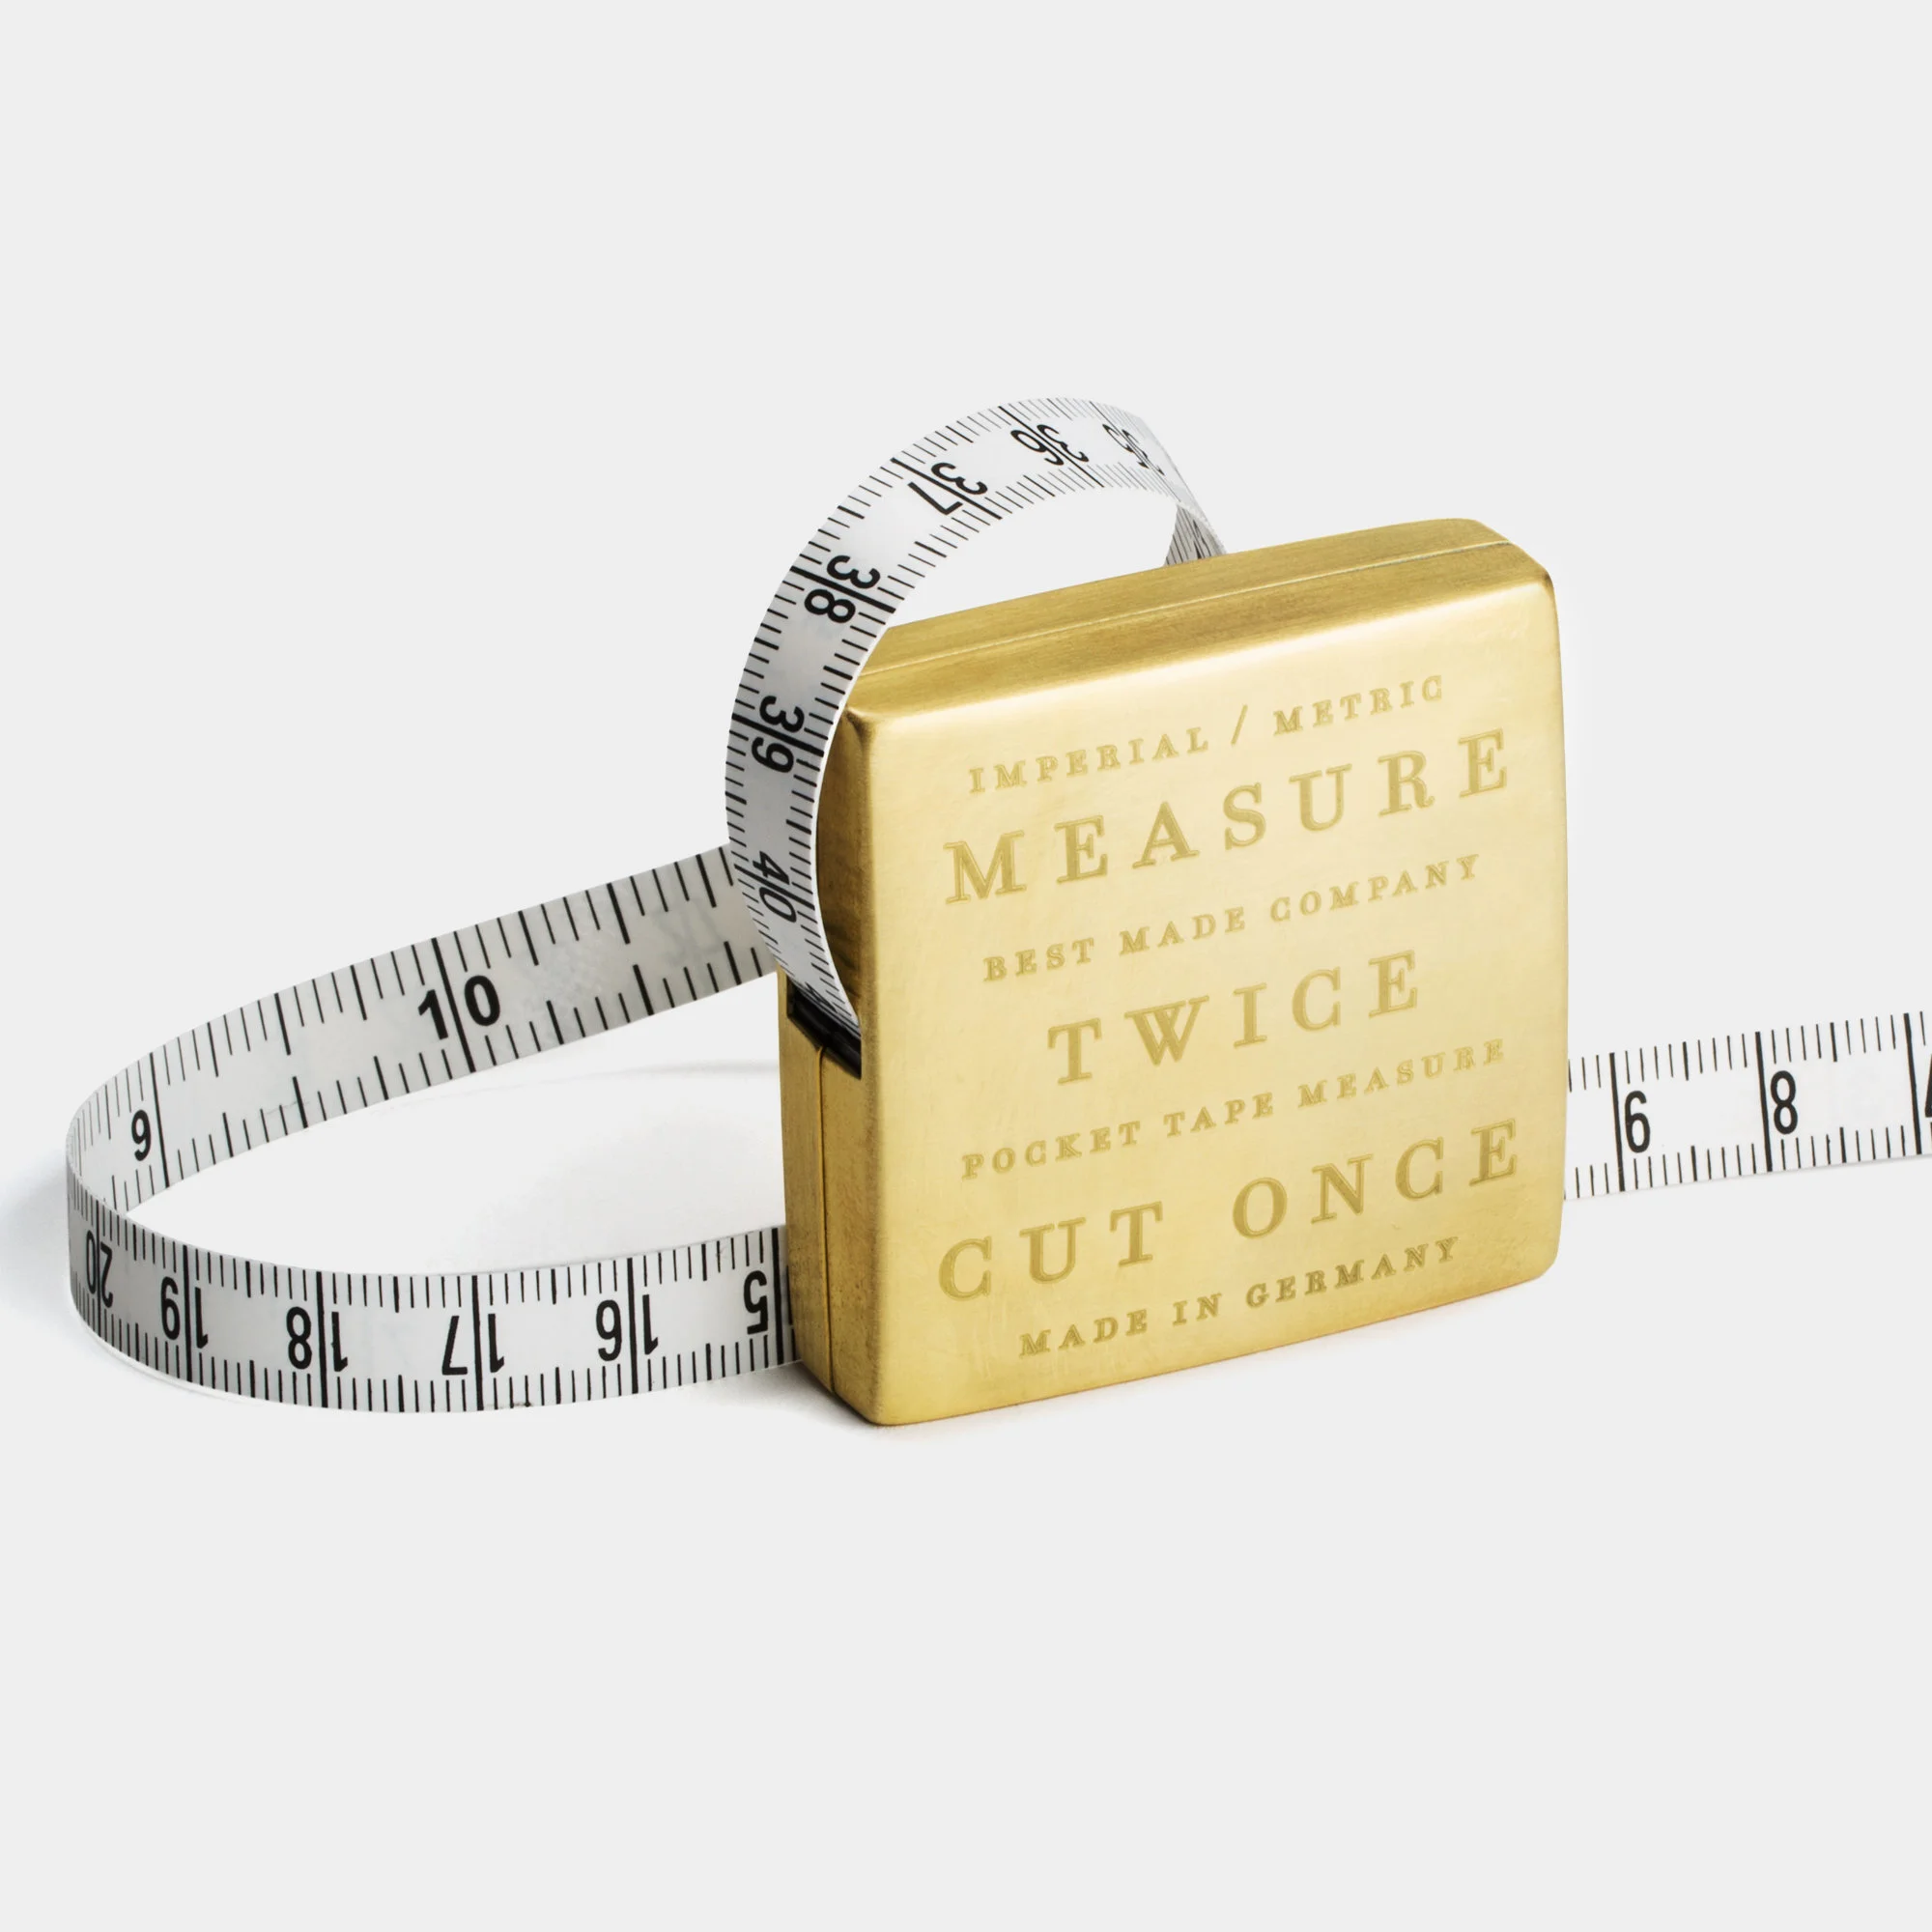
“Measure Twice, Cut Once” Solid Brass Measuring Tape
$58 from Best Made Co.
This is more of a “for the maker who has everything” gift because —let’s be honest— $58 is a lot to spend on a tape measure. But its durable, solid brass case (made in Germany) and timeless message is sure to make this one a hit.

studio carta Dressmaker Shears
$52 at Studio Carta
These dressmaker shears are functional and pretty as heck. Crafted in Italy with hard-tempered steel, sharp serrated blades and a 24-karat gold-plated handle, these shears are an heirloom in their own right.
Note: If you’re looking for a less expensive option, I always recommend the Japanese-made Kai shears. They really are the perfect scissors.

Wool and the Gang Glitterball Sock Yarn
$20 at Wool and the Gang
In general, sparkles aren’t super sustainable. But this British sourced and spun yarn is a mix of 100% naturally renewable wool and lurex offers a good compromise. Produced by eco-conscious suppliers, this extra soft wool has a subtle hint of holiday glitz.

Fringe leather tool pouch by Fringe Supply Co.
$64 at Fringe Supply Co.
Handmade in Denver, Colorado, this simple leather envelope pouch holds tools, spare needles, and all other wayward supplies. The pouch features undyed, waxed cotton stitching, an antiqued-brass snap, and natural vegetable-tanned leather.

Purl Soho Heirloom Wool Ornament Kit
$98 at Purl Soho
My grandmother made several sets of felt Christmas ornaments that have been distributed among her twelve (!) children—and children’s children—for years. I managed to acquire a couple of them and they’re one of the best parts of trimming the tree. Use this kit to make ornaments for your loved ones, or give the whole kit to a crafty someone in your life! The kit includes 100% wool felt pieces, cotton thread, needles, beads, sequins, and everything else you need to complete the project.
Purl Soho also sells beautiful felted wool bundles — great for stuffing those stockings!

Miss Make Looper Quilt Pattern
$16 at Miss Make
I am in love/ awe of this recent quilt pattern release by Devon Iott of Miss Make. I’m not a super skilled quilter, but if I was I would absolutely put this pattern on my list. The Looper includes modular blocks that can be rearranged in any direction to create a continuous design. A perfectly modern, perfectly accessibly, perfectly perfect pattern.

Llamallooma Pom-Pom Maker
$15 at Fancy Tiger Crafts
Know anyone obsessed with pom poms? Empower them to make their own with the the Llamallooma from Betz White. Made from baltic birch, the loom is easy to use and cute as all get out. Pair it with some US-grown yarn for the perfect stocking stuffer.

“Ta Da” Woven Labels by Kylie and the Machine
$8.50 at Fancy Tiger Crafts
Oeko-Tex certified in plastic-free recycled packaging, these labels let the sewist in your life do a little humble-bragging.
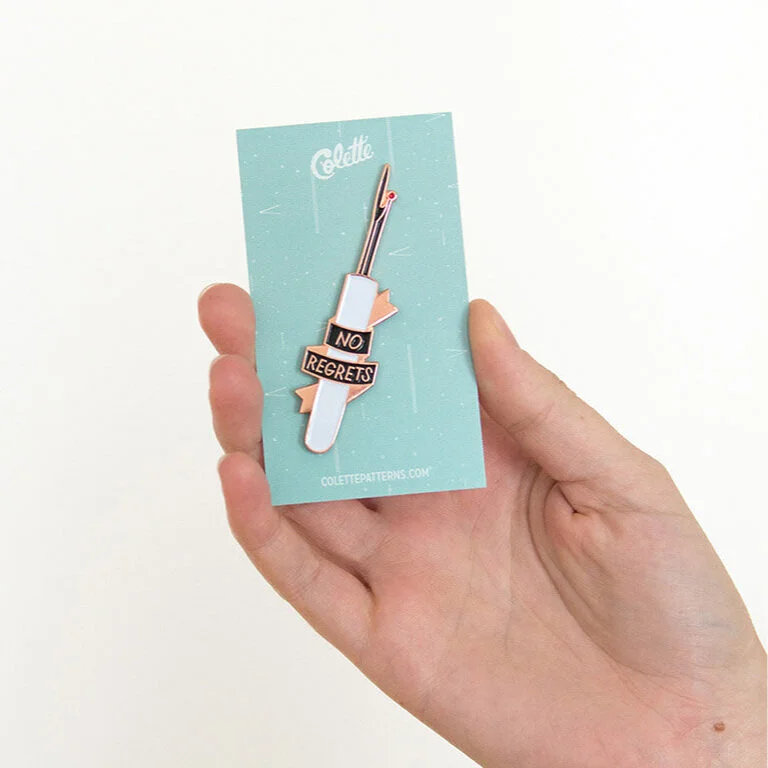
Colette Patterns Enamel Pins
$8 at Colette Patterns
These cute little sewing-themed pins make great stocking stuffers. Each pin features a beautiful rose gold finish.

Closet Case Patterns Gift Card
$25 increments at Close Case Patterns
You can never go wrong with a gift card, especially to one of the best indie pattern makers out there! This Closet Case Patterns gift cards are printed on beautiful rose and gold cardstock. Or purchase a digital version to curtail that carbon footprint.
Disclosure: This post is not sponsored, but I do make commission via Skimlinks. Thanks for supporting Birds of a Thread!
Like what you read? Give it a share!


Awkward Skirt to Fitted Top: A Fall Refashion


Holy moly, it’s been a while! During which time I’ve:
Moved to San Diego with Jon and the kiddo
Started a new role as a Communications Manager at a tech company
Contemplated whether or not to keep blogging at all (see: aforementioned cross-state move and new, demanding role)
If you follow on Instagram, though, you’ll know that I’ve squeezed in a few sewing projects, including a recent refashion of a piece I’ve had sitting in my “don’t-get-rid-of-just-yet” pile. I bought this linen midi-length skirt at Madewell on impulse — I’d gained a few pounds, couldn’t fit into any of my work clothes, and was in a bit of a panic before starting my new job. Unfortunately I sized up a little too far, and the skirt was always too big and an awkward length (mid-calf, but not in a cute way).

I loved the texture, button loop closure, and color, so I finally decided to turn it into something wearable. Here’s a look into my process:
First, I unbuttoned the button closure, cut the skirt in half horizontally, and opened the whole thing up so I had a nice hunk of fabric to work with.
Then, I laid out the pattern pieces for a Mimi G Style pattern (Simplicity 8927), aligning the front closure with the skirt’s existing button closure. This took a bit of finessing, since the pattern was designed to self-line and included seam allowances and a tie-front feature.
Once I cut and assembled the bodice, it was about an inch too wide (partly because of the seam allowances and partly because patterns are almost always bigger than their sizing guide suggests). So I pinned it to fit and redid the side seams.


4. Even then, the bust was too big and billowed out at the armpits (not totally sure what happened here, but I suspect the linen stretched a bit). So I added in some pleats along the top of the bust line before finishing with bias tape that I made from leftover pieces of the fabric. I was running low on scraps at that point, so I made it a halter instead of attaching the straps to the back as the pattern was originally designed.

5. Because I used the existing skirt hem, there was no way to properly finish the side seams. So I added tiny patches to both sides, which I actually think adds charm and gives the top a well-loved feel.
This is probably my favorite refashion to date, and one that I’ve already worn out in the real world a few times (the true test!).


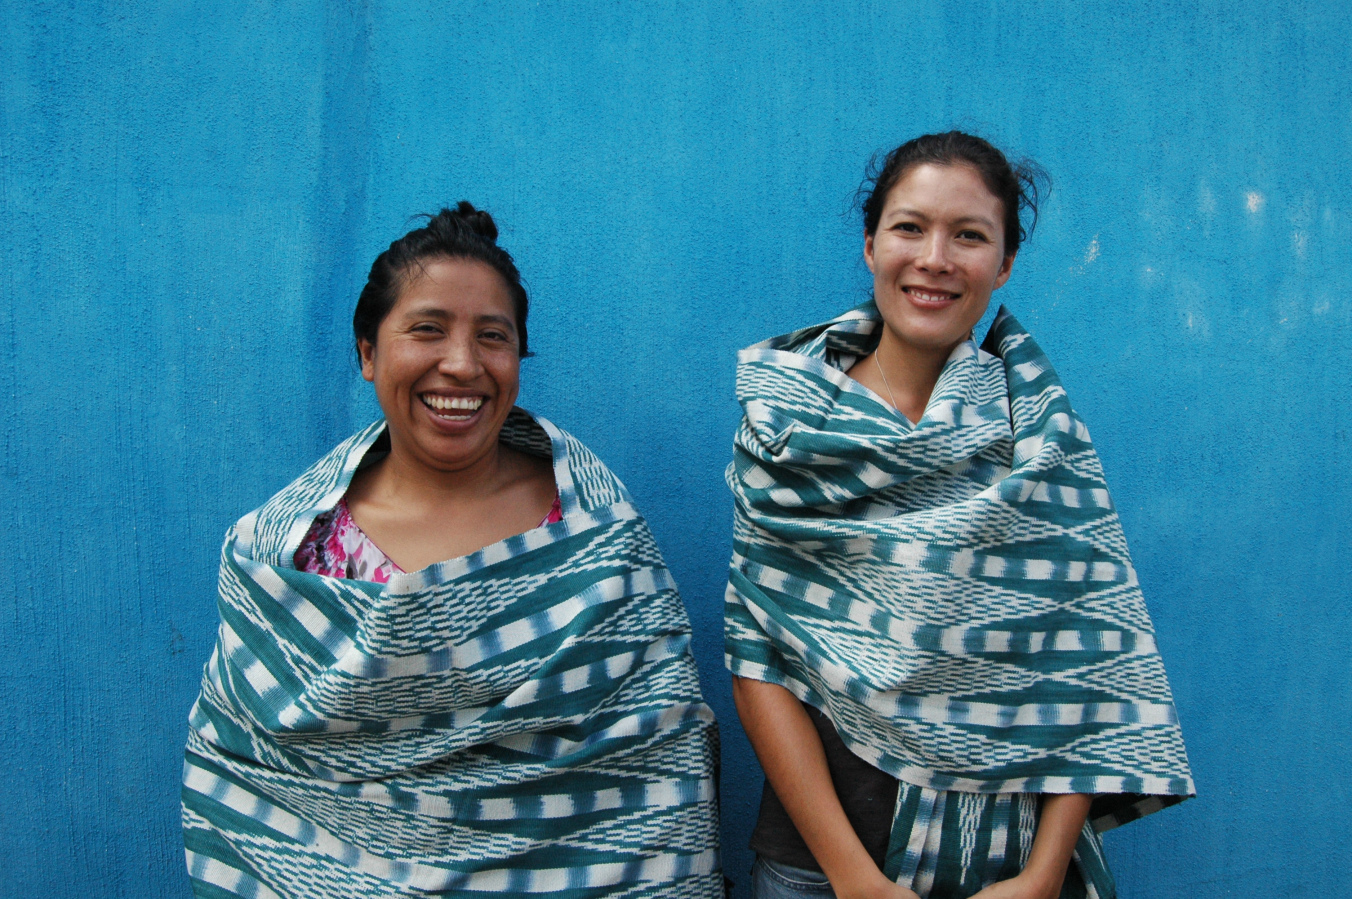
A Travel Opportunity that Honors Artisans and Fuels Creative Exchange
Last year, Mari Gray of Kakaw Designs shared out about an awesome travel exchange opportunity that she created just for makers. I’m happy to report that the program is back for a second year. Interested? I am, so I asked Mari to give us the lowdown on what participants can expect from this year’s exchange.

Can you tell us about your vision for the program and what sparked the idea in the first place?
Sure, let me explain the inspiration for this venture. After a number of years working with artisans in Guatemala as Kakaw Designs (pronounced “cacao” like the chocolate tree), I struggled with our role as a brand taking pride in unique design and high quality craftsmanship. While I love designing and working with artisan groups, I feel uncomfortable having to ask them to keep our designs exclusively for us. This is an awkward position to be in, because our partner artisan groups also have rural storefronts on their own, and sell to other stores in larger cities in Guatemala. And so if what we create together is beautiful, practical, desirable - then, it would be beneficial for the artisans to replicate these designs and sell however possible. But if we take this approach, we would be voluntarily giving up our unique edge on design. It’s a dilemma that artisan-made businesses face all over, and a big push for us to start our Textile Travels.


“How great would it be if we could come together and share our textile experiences and practices together, further strengthening bonds and supporting rural artisans to pursue innovative designs on their own?”
Another aspect I came to appreciate is that Guatemala is a destination for many creative-types from all over, because of the country’s vibrant traditions and crafts. And while there are many opportunities out there for hands-on learning experiences of traditional Maya crafts, I felt like there was big potential for visitors to also share their ideas to rural artisans, and this was not being realized. How great would it be if we could come together and share our textile experiences and practices together, further strengthening bonds and supporting rural artisans to pursue innovative designs on their own?
Well, that’s exactly what we’re trying to do.

How did last year’s textile travel exchange go, and what did the itinerary look like?
Last year, we hosted our first creative textile exchange in Guatemala. I was excited and nervous to venture out to new territories through our Textile Travel concept, but in the end all our textile workshops, travels to rural villages in Guatemala, and basically everything concerning the two itineraries we offered went smoothly. We were so fortunate to have wonderful and inspiring participants, and keeping the groups small was probably key to our success.
We facilitated a one-on-one backstrap weaving day, an in-depth textile lecture with beautiful vintage samples from all over the country, a hand-embroidery day where we could work on our own projects (think jeans and jackets), and a series of workshops at Lake Atitlán with our partner weavers there, including local plant dyes, indigo dyeing, ikat warp, and more. In our second itinerary, we included visits to rural villages that are truly off the beaten path and rather difficult to reach for “normal” tourists. We visited our partner weavers in these areas also, and they welcomed us with home-cooked regional specialties, and one group even had live music in our honor. What a treat!


What can travelers expect this year? Any changes to the program?
This August, we’re going to slow down a little bit, taking conscious down-time, because phew, it’s a lot to take in with all the colors, patterns, flavors, and new friendships. And since our primary goal is to create a space for idea exchange and mutual benefit among rural artisans and international participants, I do think it’s important to include a little bit of daydreaming time so that we can get those creative juices flowing. In this regard, we’ve added a couple of extra days, and low-key activities like tassel and pompom making. We will have a bit more time to wander on our own also, and shop directly from artisan cooperative groups.
If you’re interested in hearing more, please shoot me an email at mari@kakawdesigns.com.

Sewing Space Tour: My Corner of the Garage


Last week I finally organized the garage and carved out a sewing/making space for myself. I’ve been feeling overwhelmed by the prospect of sewing lately, and that’s partly because of the chaos it creates. Life with a toddler takes its toll on our house, and adding fabric scraps, pattern trimmings, wayward cords, and dangerous tools to the mix was just too much for my anxiety-ridden mom brain. Creating a designated space outside of Avery’s realm has made all the difference; I can start projects, set them aside, and return to them when the mood strikes (i.e., Avery's bed time). I don’t feel the pressure to finish projects in one night, and I can leave sharp objects lying around. It’s awesome.


This space didn't happen overnight, though. I've accumulated my sewing and crafting supplies over the course of many years, some of them even dating back to high school (when I was really into making found object shadowboxes and/or covering said objects in glitter). Consequently, not everything pictured here is "shoppable," like the vintage letterpress drawer where I store my thread, the bamboo ladder used for hanging trim and project pieces, or the plaster skull that displays my favorite buttons and hair pieces. Some of my storage solutions have sentimental value, like the floral sewing tin that belonged to my grandmother and the cigar box that I found in a dusty antique store in Berkeley. And some of them are plastic ArtBins from Joann's. It's a balance.
I bought a basic bamboo HILVER table top and adjustable legs from Ikea, partly because our garage floor is so uneven that each leg needed to be a slightly different length. I've also got the ubiquitous RASKOG utility cart and KALLX shelving; like many sewing spaces, I'm pretty Ikea-ed out. I still use our dining room table to cut patterns, although I'd love to create a custom cutting table some day.
In terms of tools and machinery, I'm a big fan of Clover products (measuring tape, seam ripper, chalk pen), Kai Dressmaking Shears, and Gingher scissors/ rotary cutters (partly because they're just so pretty). I purchased my Bernina 330 sewing machine and JUKI serger a couple of years ago (based on Heather's Closet Case Files review), and they've made a huge difference in the quality of my sewing projects. I'm love sewing with knits and silks now, confident that I can create professional-looking seam finishes and beautiful hems.
I keep my prettiest supplies out on display for inspiration (patterns, fabric, thread, buttons), and the rest sealed up in bins for later use. It's just the right level of quirky clutter, complete with pineapple-lined shelving, and I wouldn't have it any other way.


Travel Opportunity for Makers: A Creative Textile Exchange in Guatemala

I'm super excited to share this travel opportunity, hosted by Mari of Kakaw Designs, with you. Read on for the details.
Come together to share, learn, and create
Are you a crafty person who likes to make things and who cherishes handmade traditions? I am, too! But I bet our experiences and ideas are different.
That’s the basis of our upcoming Textile Travel for Makers, launching in August 2018. While working with textile artisan communities in Guatemala through my business Kakaw Designs, I’ve come to realize how interested our partner artisans are in learning about different techniques, patterns, designs, and concepts. And ultimately, wouldn’t it be ideal if these talented artisans could themselves take a more active role in the design process, without depending on designers from outside of their communities?
This is the part that I love most about working with artisans: getting excited together about new creations, and trying out new ideas. But I’m just one person, and I only have a small limited number of ideas. That’s why I’d like to invite other creative Makers out there to join us on this new journey of idea exchange in Guatemala.
We’re so excited to share our crafts together – our partner artisans are experts in natural dyes, backstrap weaving, embroidery, making ikat designs, and more. But it’s no surprise that it can be challenging to think outside of the box in the rural context, especially for tactile and visual traditions like in textiles. So, we thought – why not come together and share our ideas in beautiful Guatemala, and have fun while at it?
Our artisan partners are happy to share their traditional craft techniques, and they’re also looking forward to hearing about different experiences and ideas, especially with textiles. We’ll be hosting workshops to facilitate creative idea exchange in a safe space for all of us to come together and take part in a true and real kind of cultural exchange that we can all relate to as Makers.


Who can participate?
Anyone crafty and creative is encouraged to come. Obviously weavers, embroiderers, and seamstresses have a lot to directly contribute to rural artisans, but also I think it's really interesting to hear from people with experience in other techniques that are not prevalent in Guatemala, such as quilting, knitting, block printing, shibori, sashiko, or leaf printing. Skills such as color theory, presentation of products, and simple photography could also all be very helpful, so please feel free to reach out, whether you're an active "maker" or not. I think we all have something to contribute and can learn from each other.
How much will it cost, can what can you expect?
I’ll be leading the small group through Guatemala, together with my mother, Aiko Kobayashi, who has been a textile tour guide for over two decades. We’re excited to add this creative twist, further enhancing both the visitors’ and the artisans’ experiences and making sure that local communities benefit in a meaningful way. We’re currently taking sign-ups for the trip, with two available itineraries starting at only $1800. For more details, please go to our website and/or email me.
Isn’t it great when an idea is just all-around good, benefitting everyone involved? That’s how we feel about this new branch of Kakaw Designs. Supporting our partner artisans even more while at the same time enhancing participants’ travel experiences in an ethical and sustainable way through exchanges based on common interests as Makers of the world. We’re so excited to get our creative juices flowing, together.
Mari Gray
mari@kakawdesigns.com
kakawdesigns.com

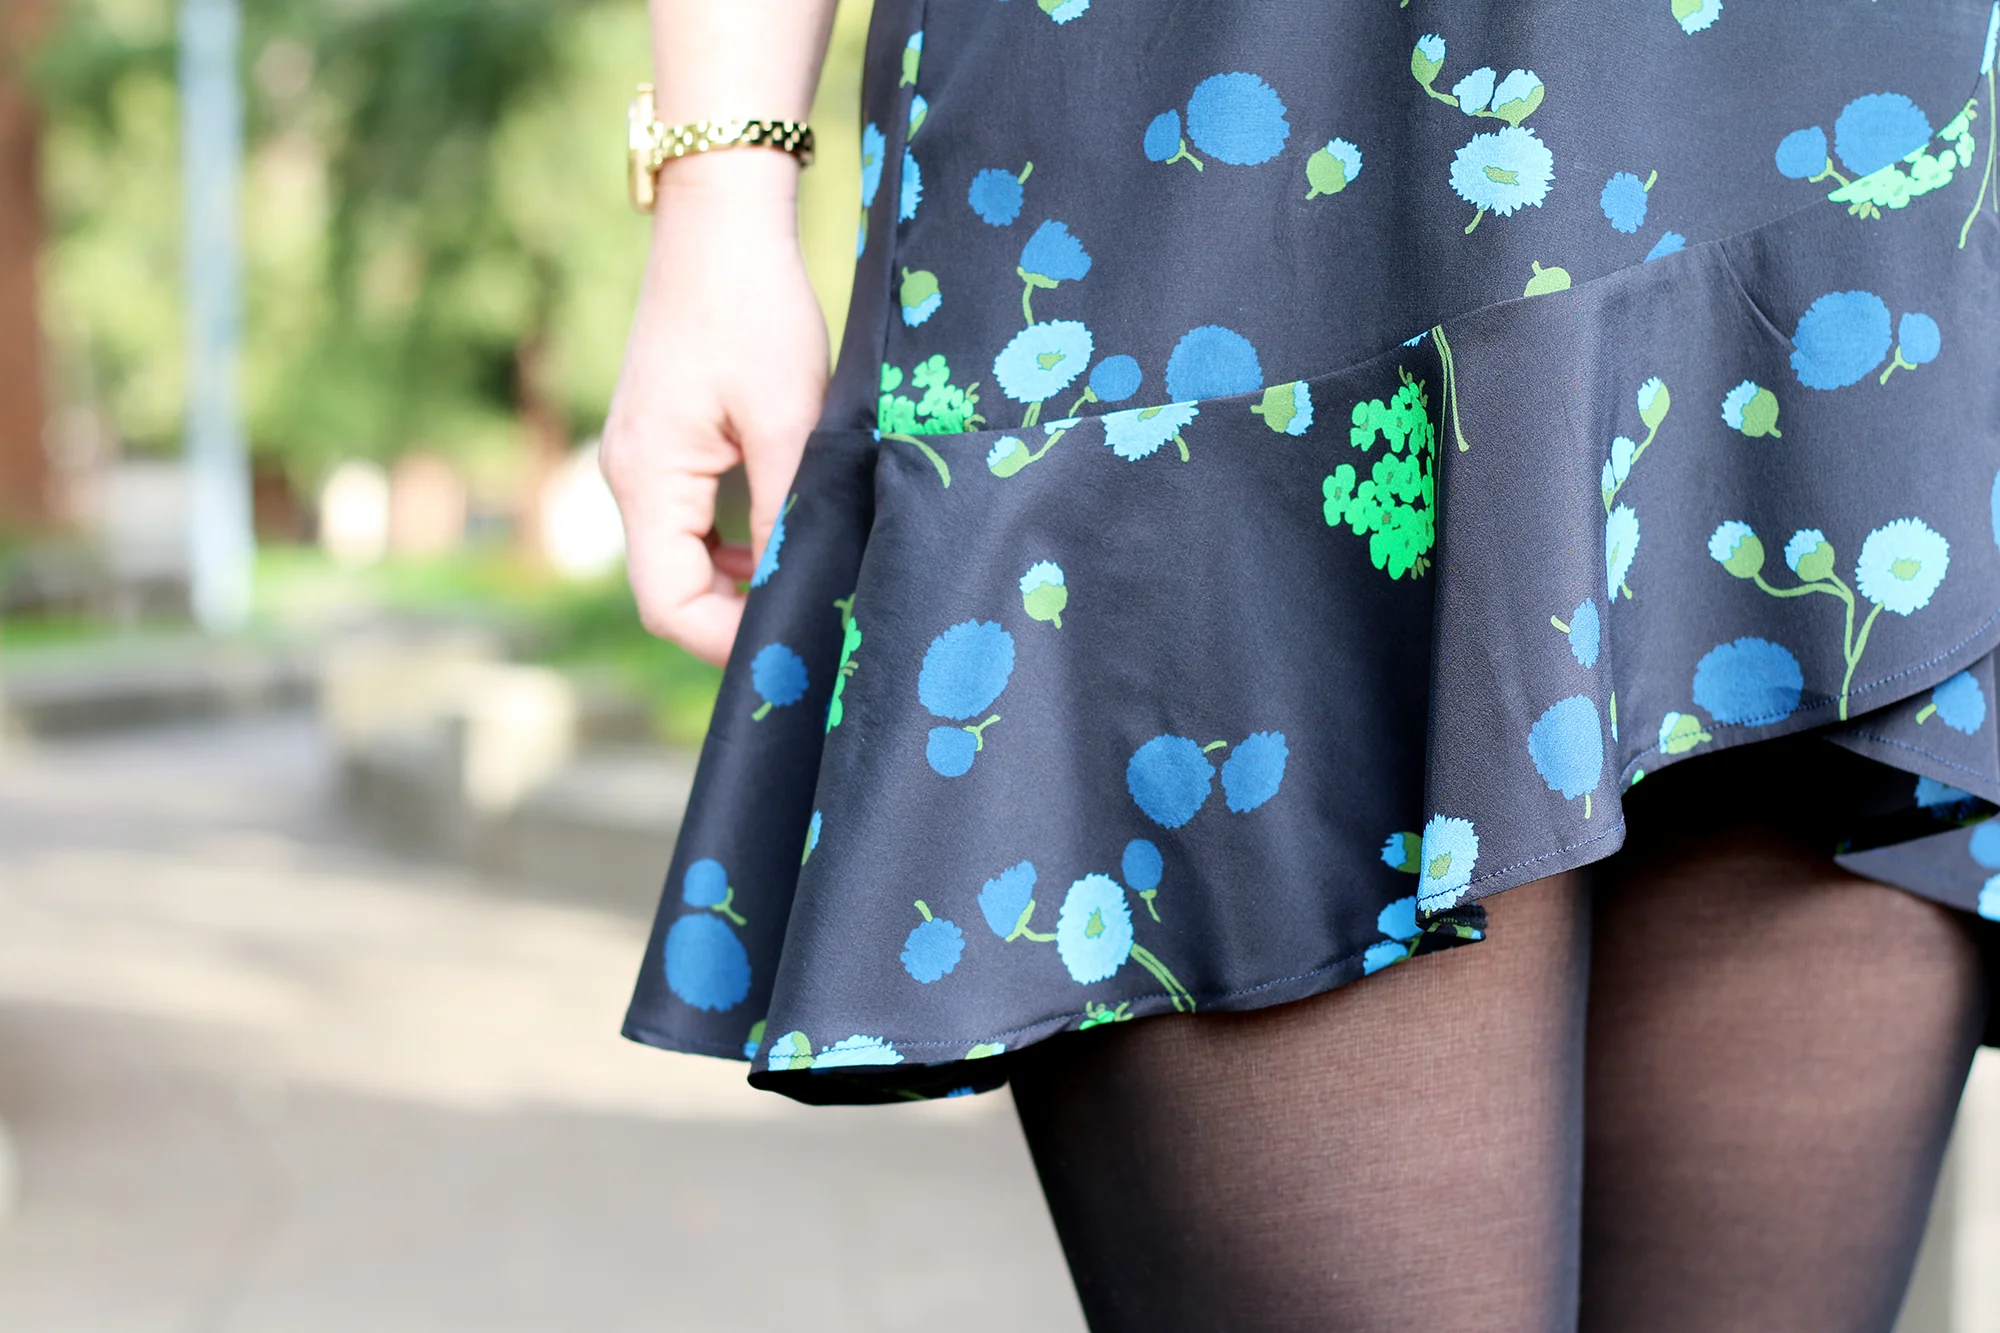
A Ruffly Distraction: Papercut Patterns Adrift Dress


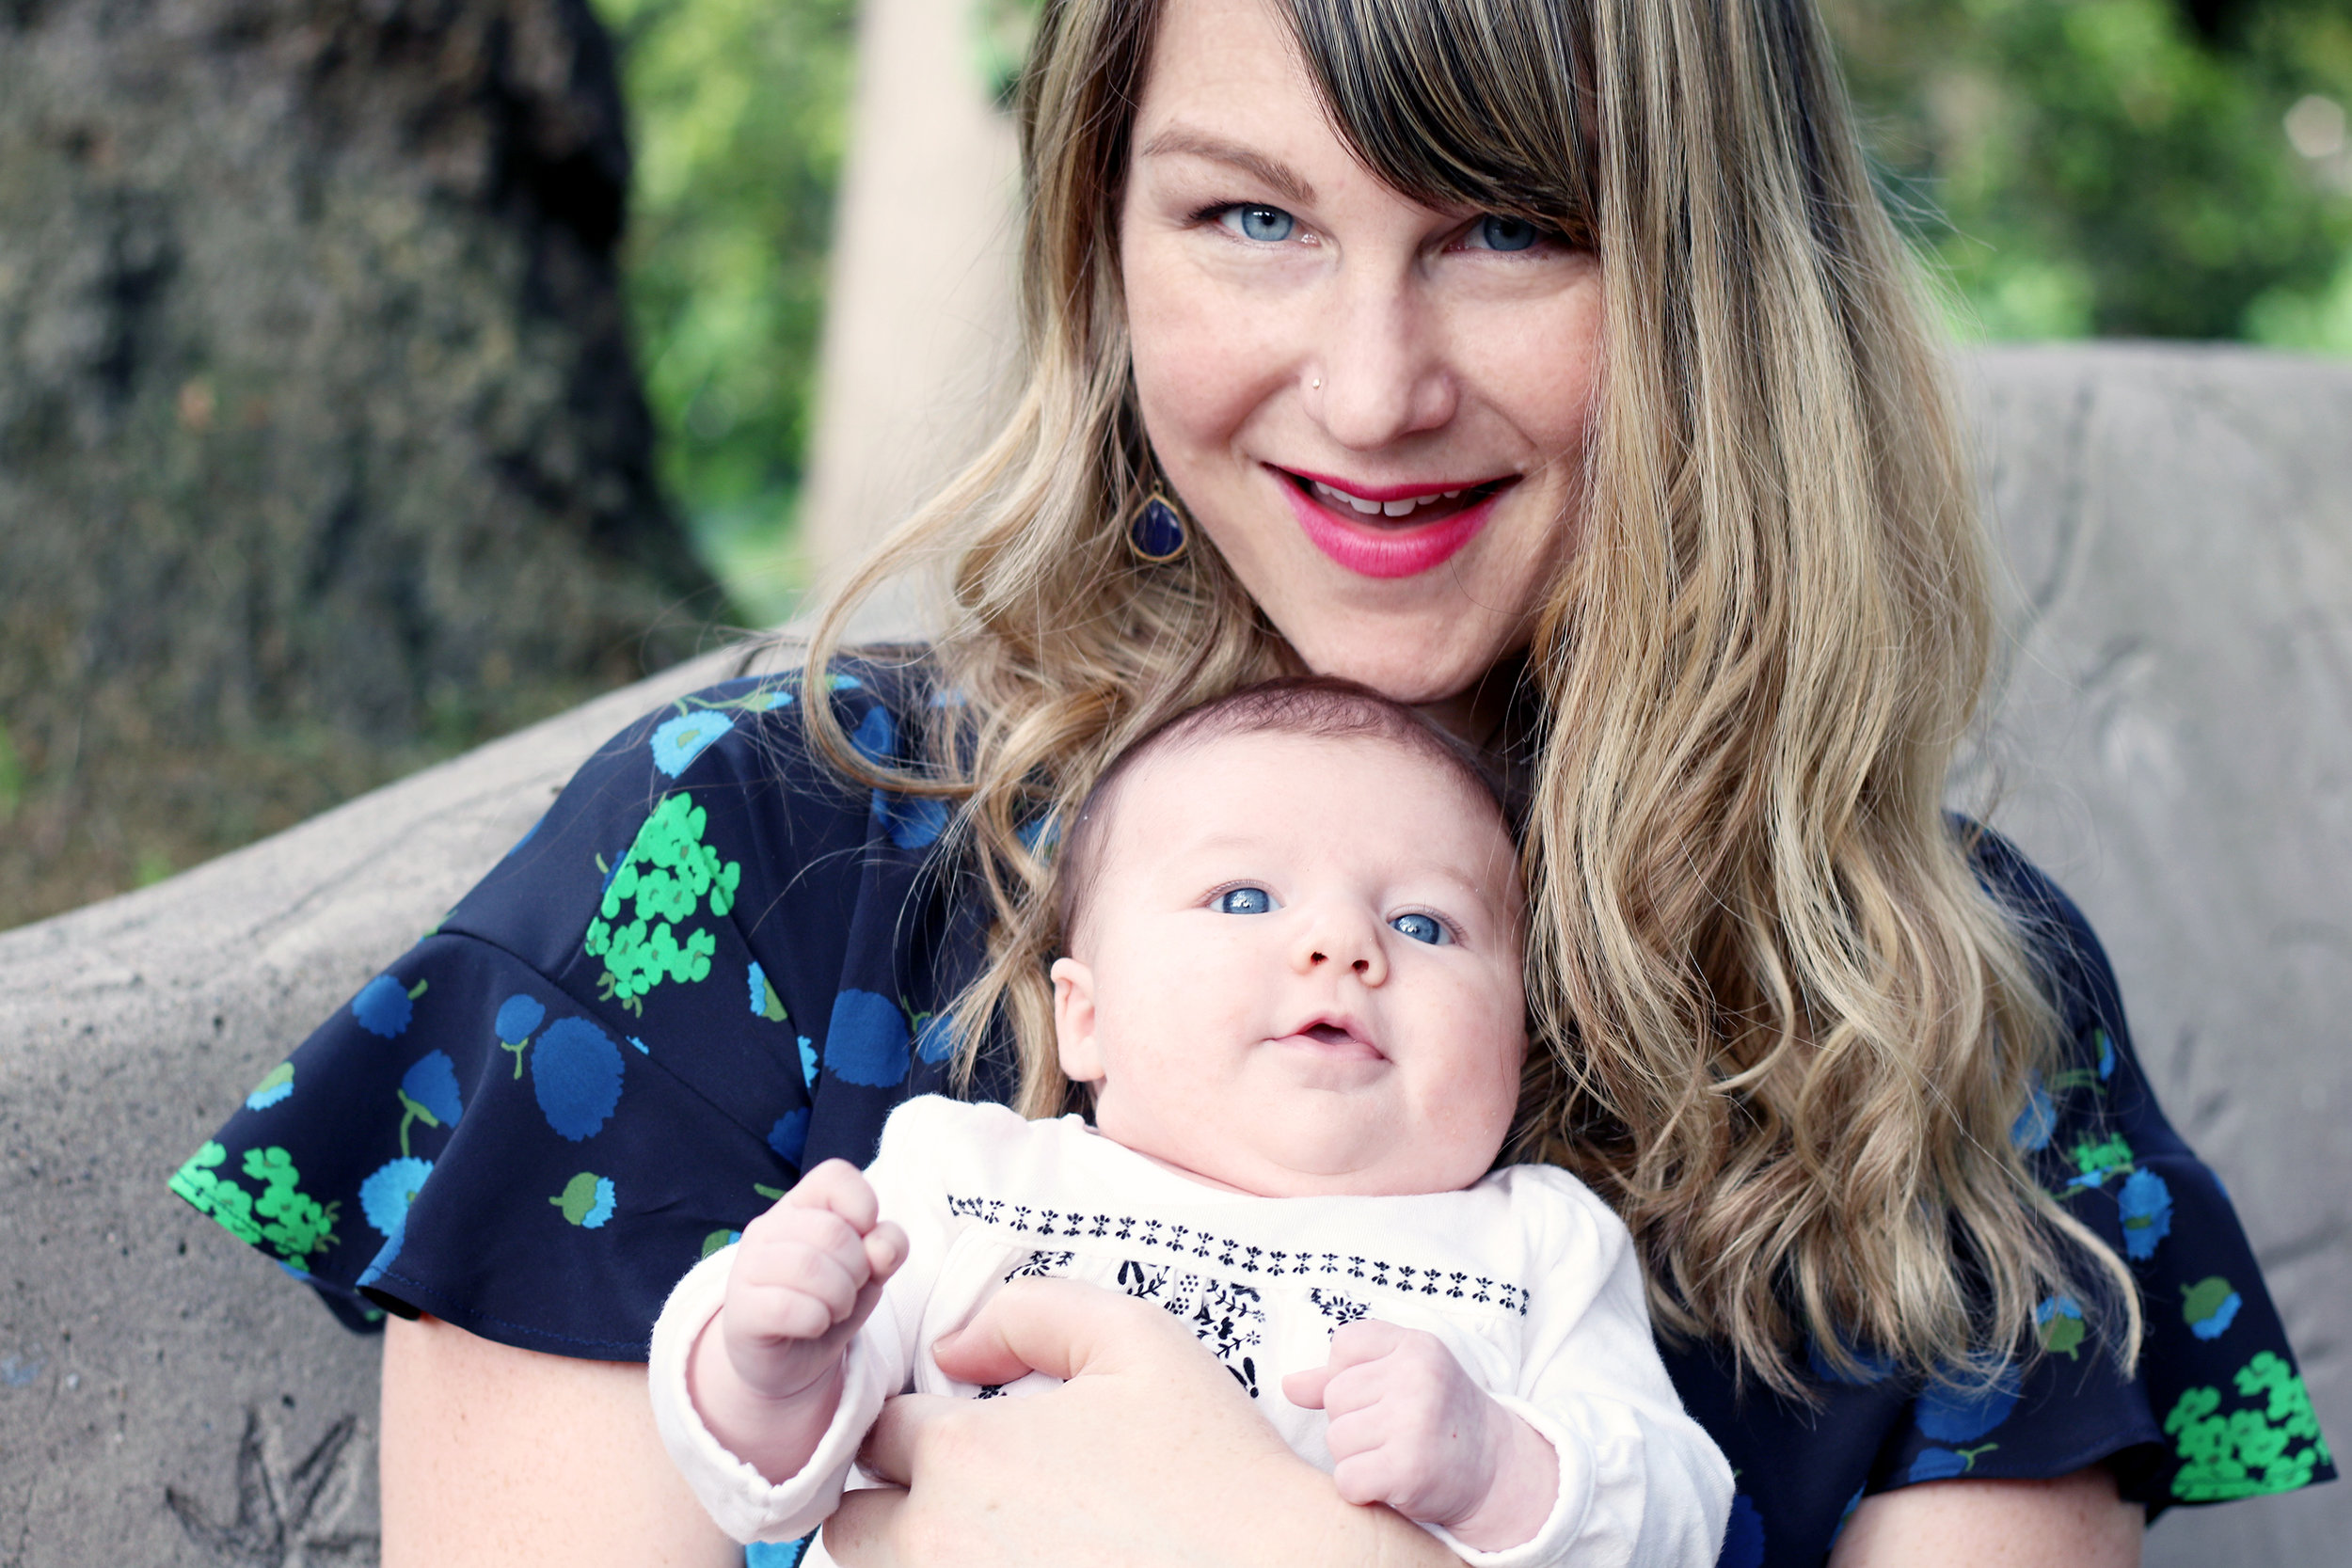
I won't sugarcoat it: the last seven weeks have been tough. I love, love, love our baby girl more than I can express, but sleep deprivation, a recovering body, and lack of daily routine (where do I work again? Who am I even??) have left me reeling. Combine that with the generally screwed up state of our country and.... well anyway, we're all feeling it.
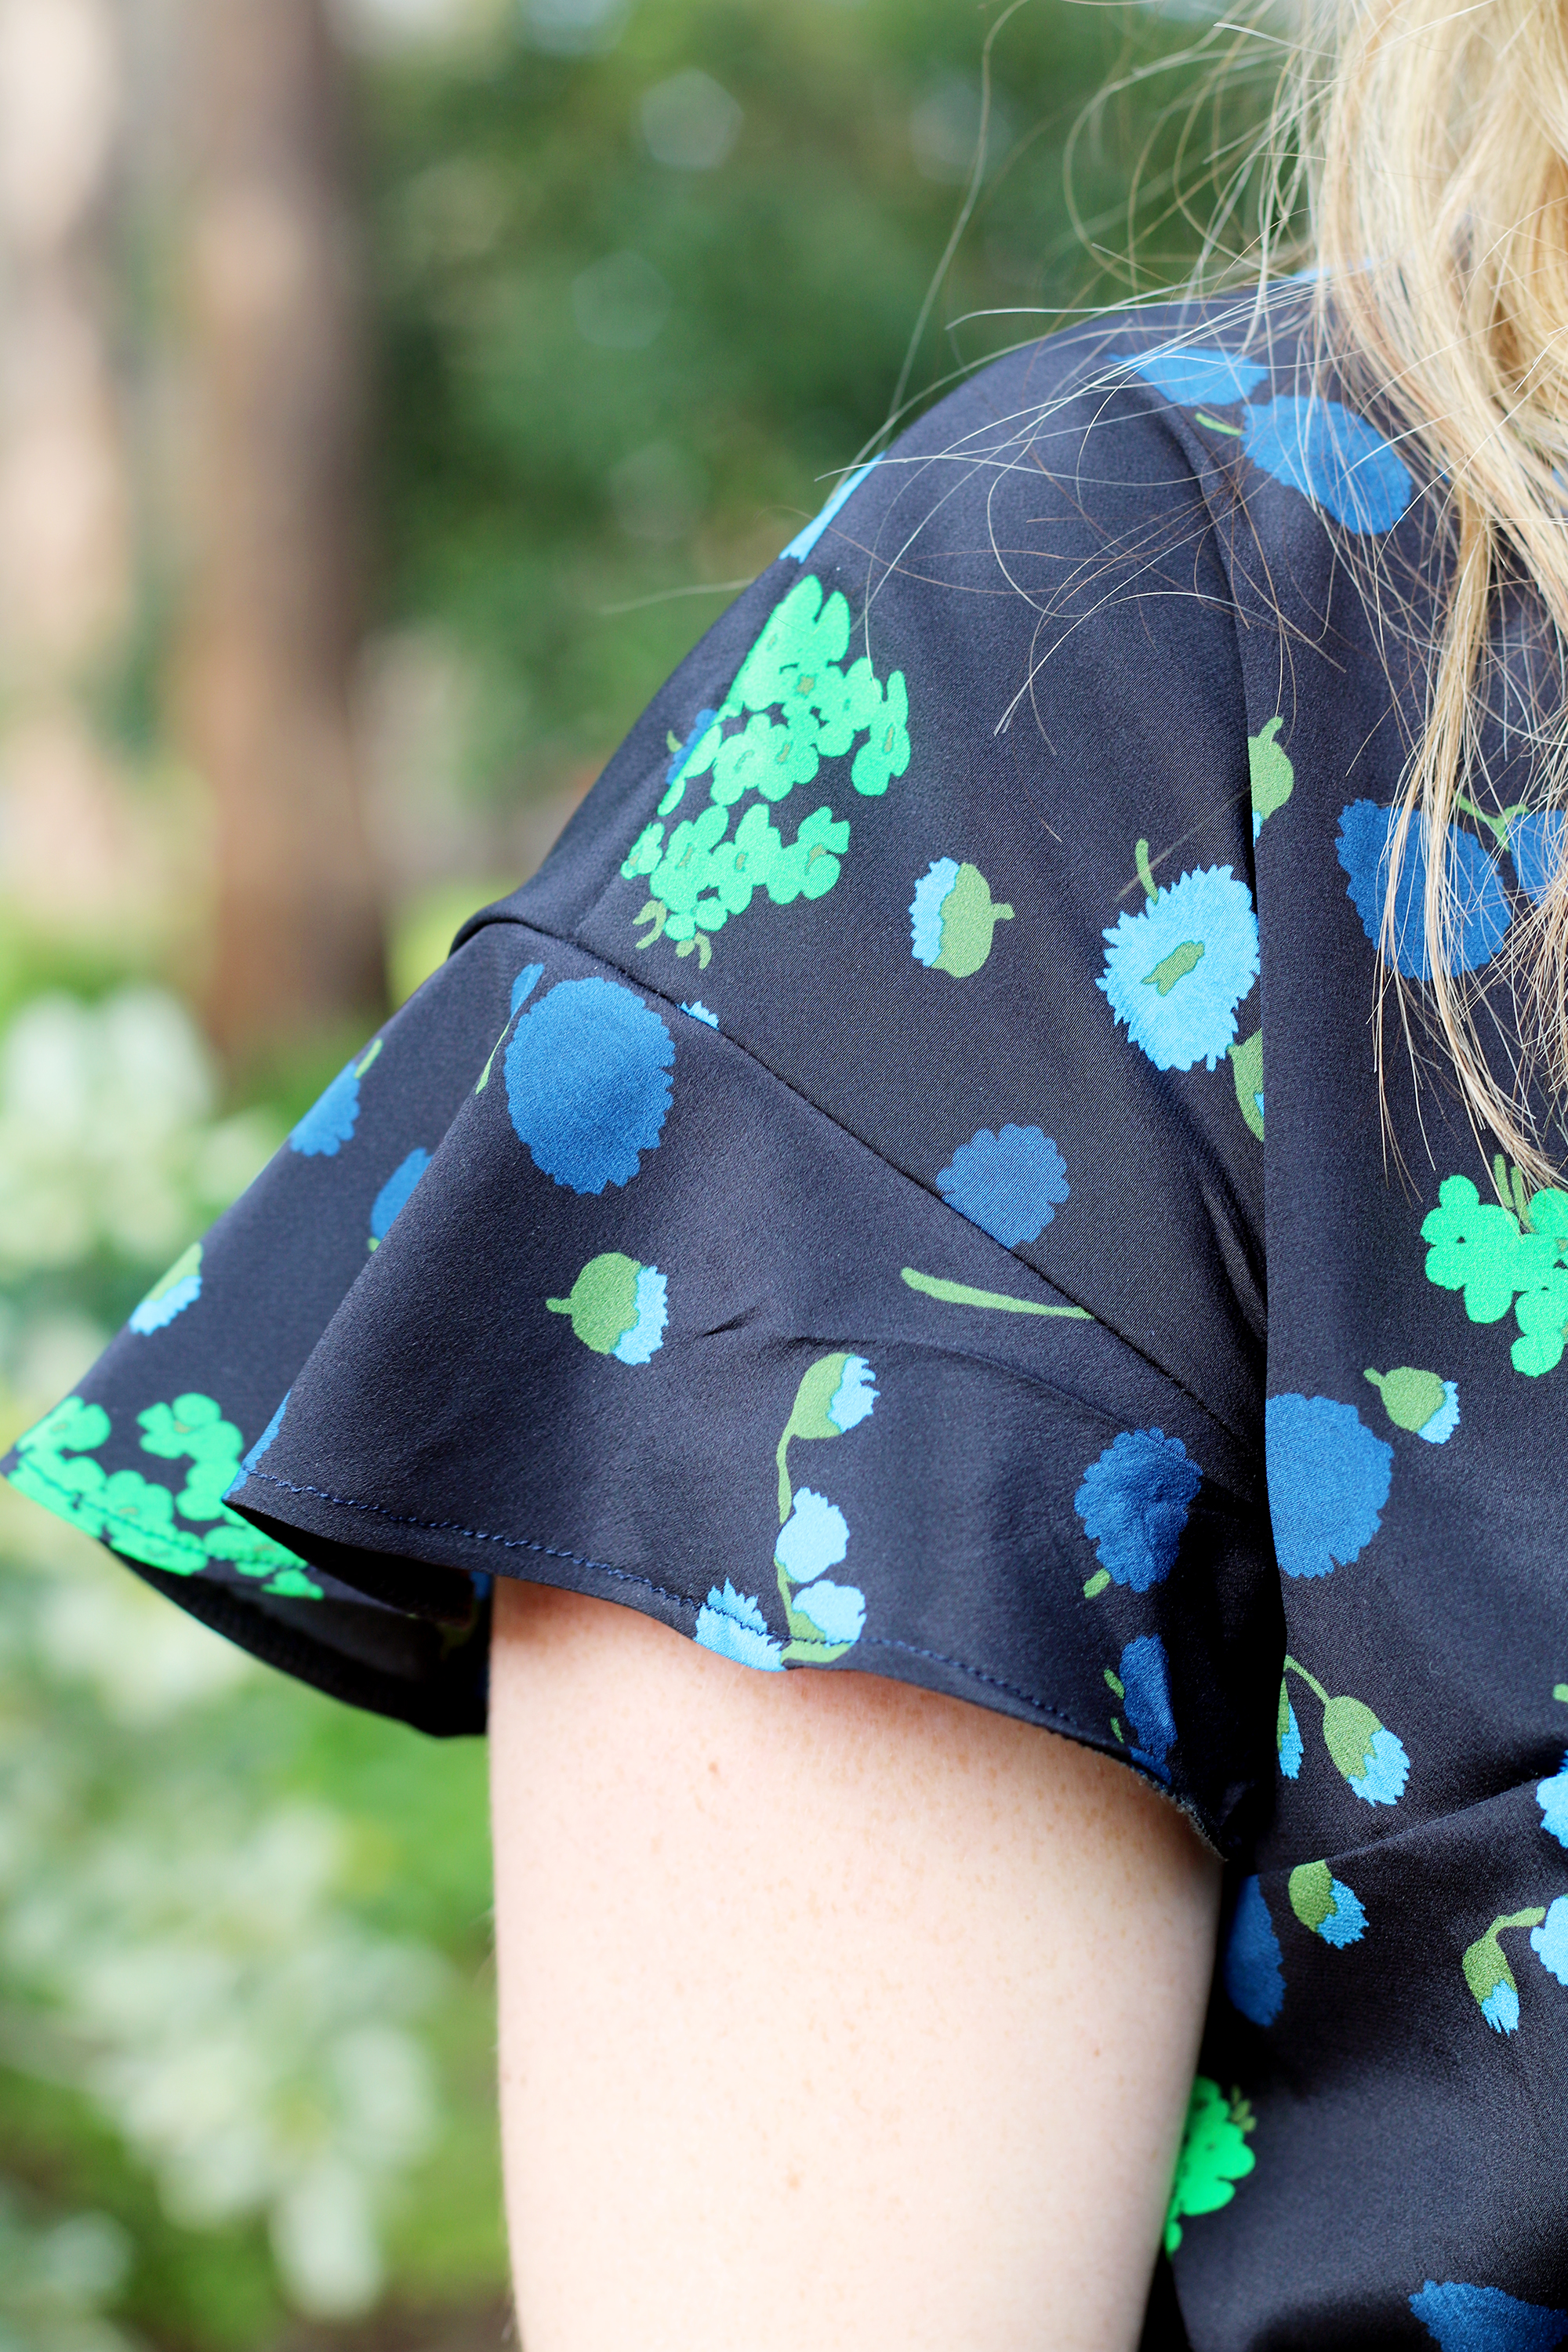
On the other hand, I really love being at home with my little boo. She's growing and changing by the minute (those fat little cheeks! I die!), and I even have a few hours here and there to sew while she sleeps. So let's take a moment to forget the frightening new world order and celebrate silk, cinched waists, and ruffles! Brought to you by Papercut Pattern's Adrift Dress and Avery's nap time.

Pattern and Fit
Here’s my dirty little sewing secret: I never make muslins. Since most patterns fit me without any adjustments I get cocky, and I can't handle the idea of making a garment twice (I only have so much free time, dudes!). But I learned my lesson this time, and unfortunately I had to learn it while using some very expensive Missoni silk.
One of the reasons I’ve been inspired to sew lately is that none of my pre-maternity clothes fit. I’m sure they will eventually, but for now I’m stuck in that awkward postpartum limbo where my bust is three times bigger, my belly still smooshy and protruding, and my shape a little foreign to me. So even though I cut the pattern a size bigger, it still ended up being way too short. I did make one other adjustment by inserting a waistband between the skirt and blouse instead of folding it under like the pattern instructs, elongating the dress by about an inch. The dress is still completely wearable with tights and a slip, but I’m kicking myself for not planning better (I'm also guessing that the pattern has a short waist to begin with, so if you’re a long-torsoed gal like me, make sure to account for that before cutting!).
Otherwise, I give the Adrift Dress an A+. The drape is to die for, and the ruffles were actually a lot easier to assemble than I’d anticipated. That’s the magic of a well-drafted pattern!

Fabric
I found the silk at Britex a few months ago. It’s Missoni, it’s scrumptious, it's made in Italy, and it cost way too much. I realized as I was sewing that it was actually the first time I’ve worked with 100% silk, and I probably should have used a finer needle. But overall it was fairly easy to work with.
I’m interested in learning more about silks in general — specifically, what makes this particular silk drape so well and remain nearly impervious to wrinkles? I own several 100% silk blouses, and some of them are wrinkle-resistant while others are barely wearable without creasing. Does anyone know what the difference is, terminology-wise? I’m particularly curious because I’d like to order some ethically-sourced silk online, but I’m afraid it won’t have the texture that I’m looking for.
More sewing plans
I have no idea how long it will be until I lose the fifteen pounds I need to get back to my fighting weight. And who knows, maybe I never will. I don’t hate my postpartum body — I’m amazed by what it did — but I do need to sew or buy some new pieces to get me through the next few months. I’m planning a small capsule wardrobe that includes another solid version this dress, a Sew Over It wrap dress, a Grainline Archer, a Colette Mabel, a couple of True Bias Ogden Camis, and some Closet Case Files Ginger Jeans. Ambitious? Absolutely. But sewing is one of the few things that’s been keeping me sane lately. Well that, and Miss Cheeks over here.
Refashioners 2016: DIY Maternity Jeans
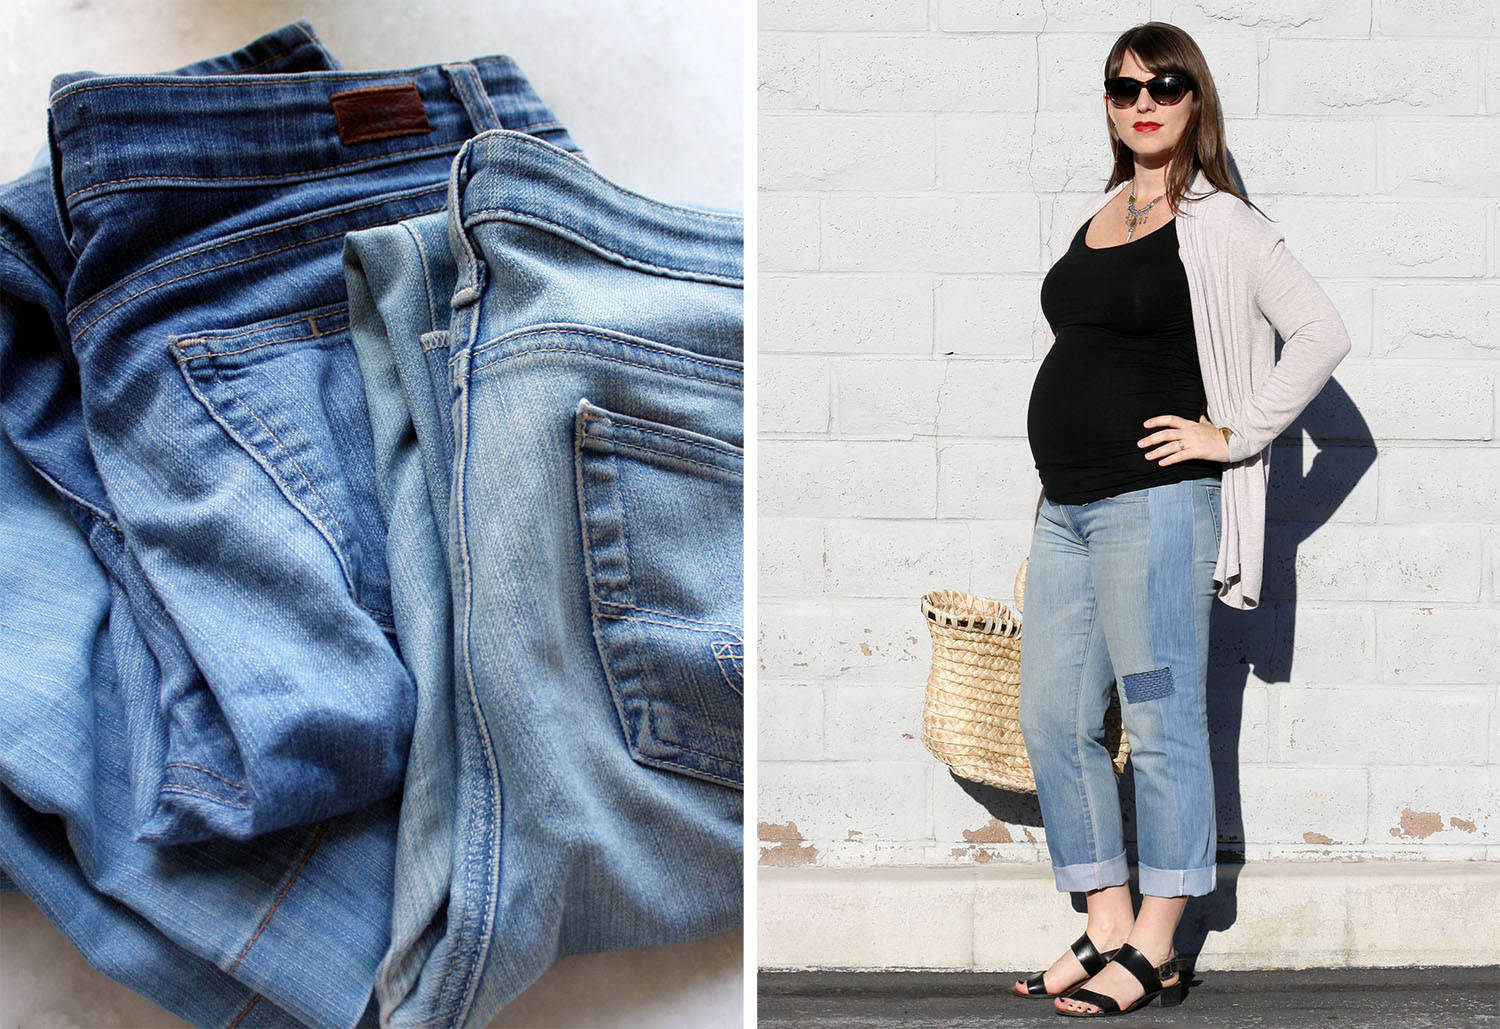

The Refashioners challenge is in full swing over at The Makery, and I thought I'd use the opportunity to make myself a pair of maternity jeans that actually fit.
I bought a pair of Paige maternity jeans a few months ago thinking they would last my entire pregnancy. Ha. Ah ha ha ha. Oh Jacqui, so naive. The stiff elastic strips sewn in place of pockets are a total joke. And the waistband now digs into my belly, creating quite the muffin top. It's uncomfortable, and unflattering, and I'm a little mad at myself for getting talked into fancy maternity jeans in the first place. No big deal though – at least it inspired me to create something on my own!
I started with an old pair of Adriano Goldschmied jeans that I rarely wear. I knew I needed the waistband to fit under my belly, so I removed it and trimmed the top of the jeans by about an inch and a half:

After adding in side panels (see below), I reattached the waistband and added an extra strip that I took from another pair of worn-out jeans. I added elastic to this piece so that the waist can grow with me into the third trimester. Initially I considered attaching a jersey panel like you see on most below-the-belly maternity styles. But because most of my maternity shirts are nice and long, adding extra fabric to the jeans just felt redundant.

Now on to the legs. It's cute to think that the only part of you that gets bigger with pregnancy is your belly. But for many women, including yours truly, pretty much everything expands. There was no way these size 29 jeans were going to fit over my healthy butt and thighs, so I opened up the side seams and added in an extra panel cut from another pair of old jeans. I really like the slight contrast between the two washes, and resulting cut is less skinny, more boyfriend.


Finally, I added in a couple of decorative patches using Shashiko stitching. Shashiko is a Japanese style of functional embroidery traditionally used to reinforce points of wear or to mend holes, and it's all over the place right now. While I didn't actually need to apply these patches, I thought the jeans could use a little flair, and I wanted to try my hand at a new technique.
And that's it! They fit great, they're pretty darn cute, and they didn't cost me a penny.


DIY Off the Shoulder Blouse

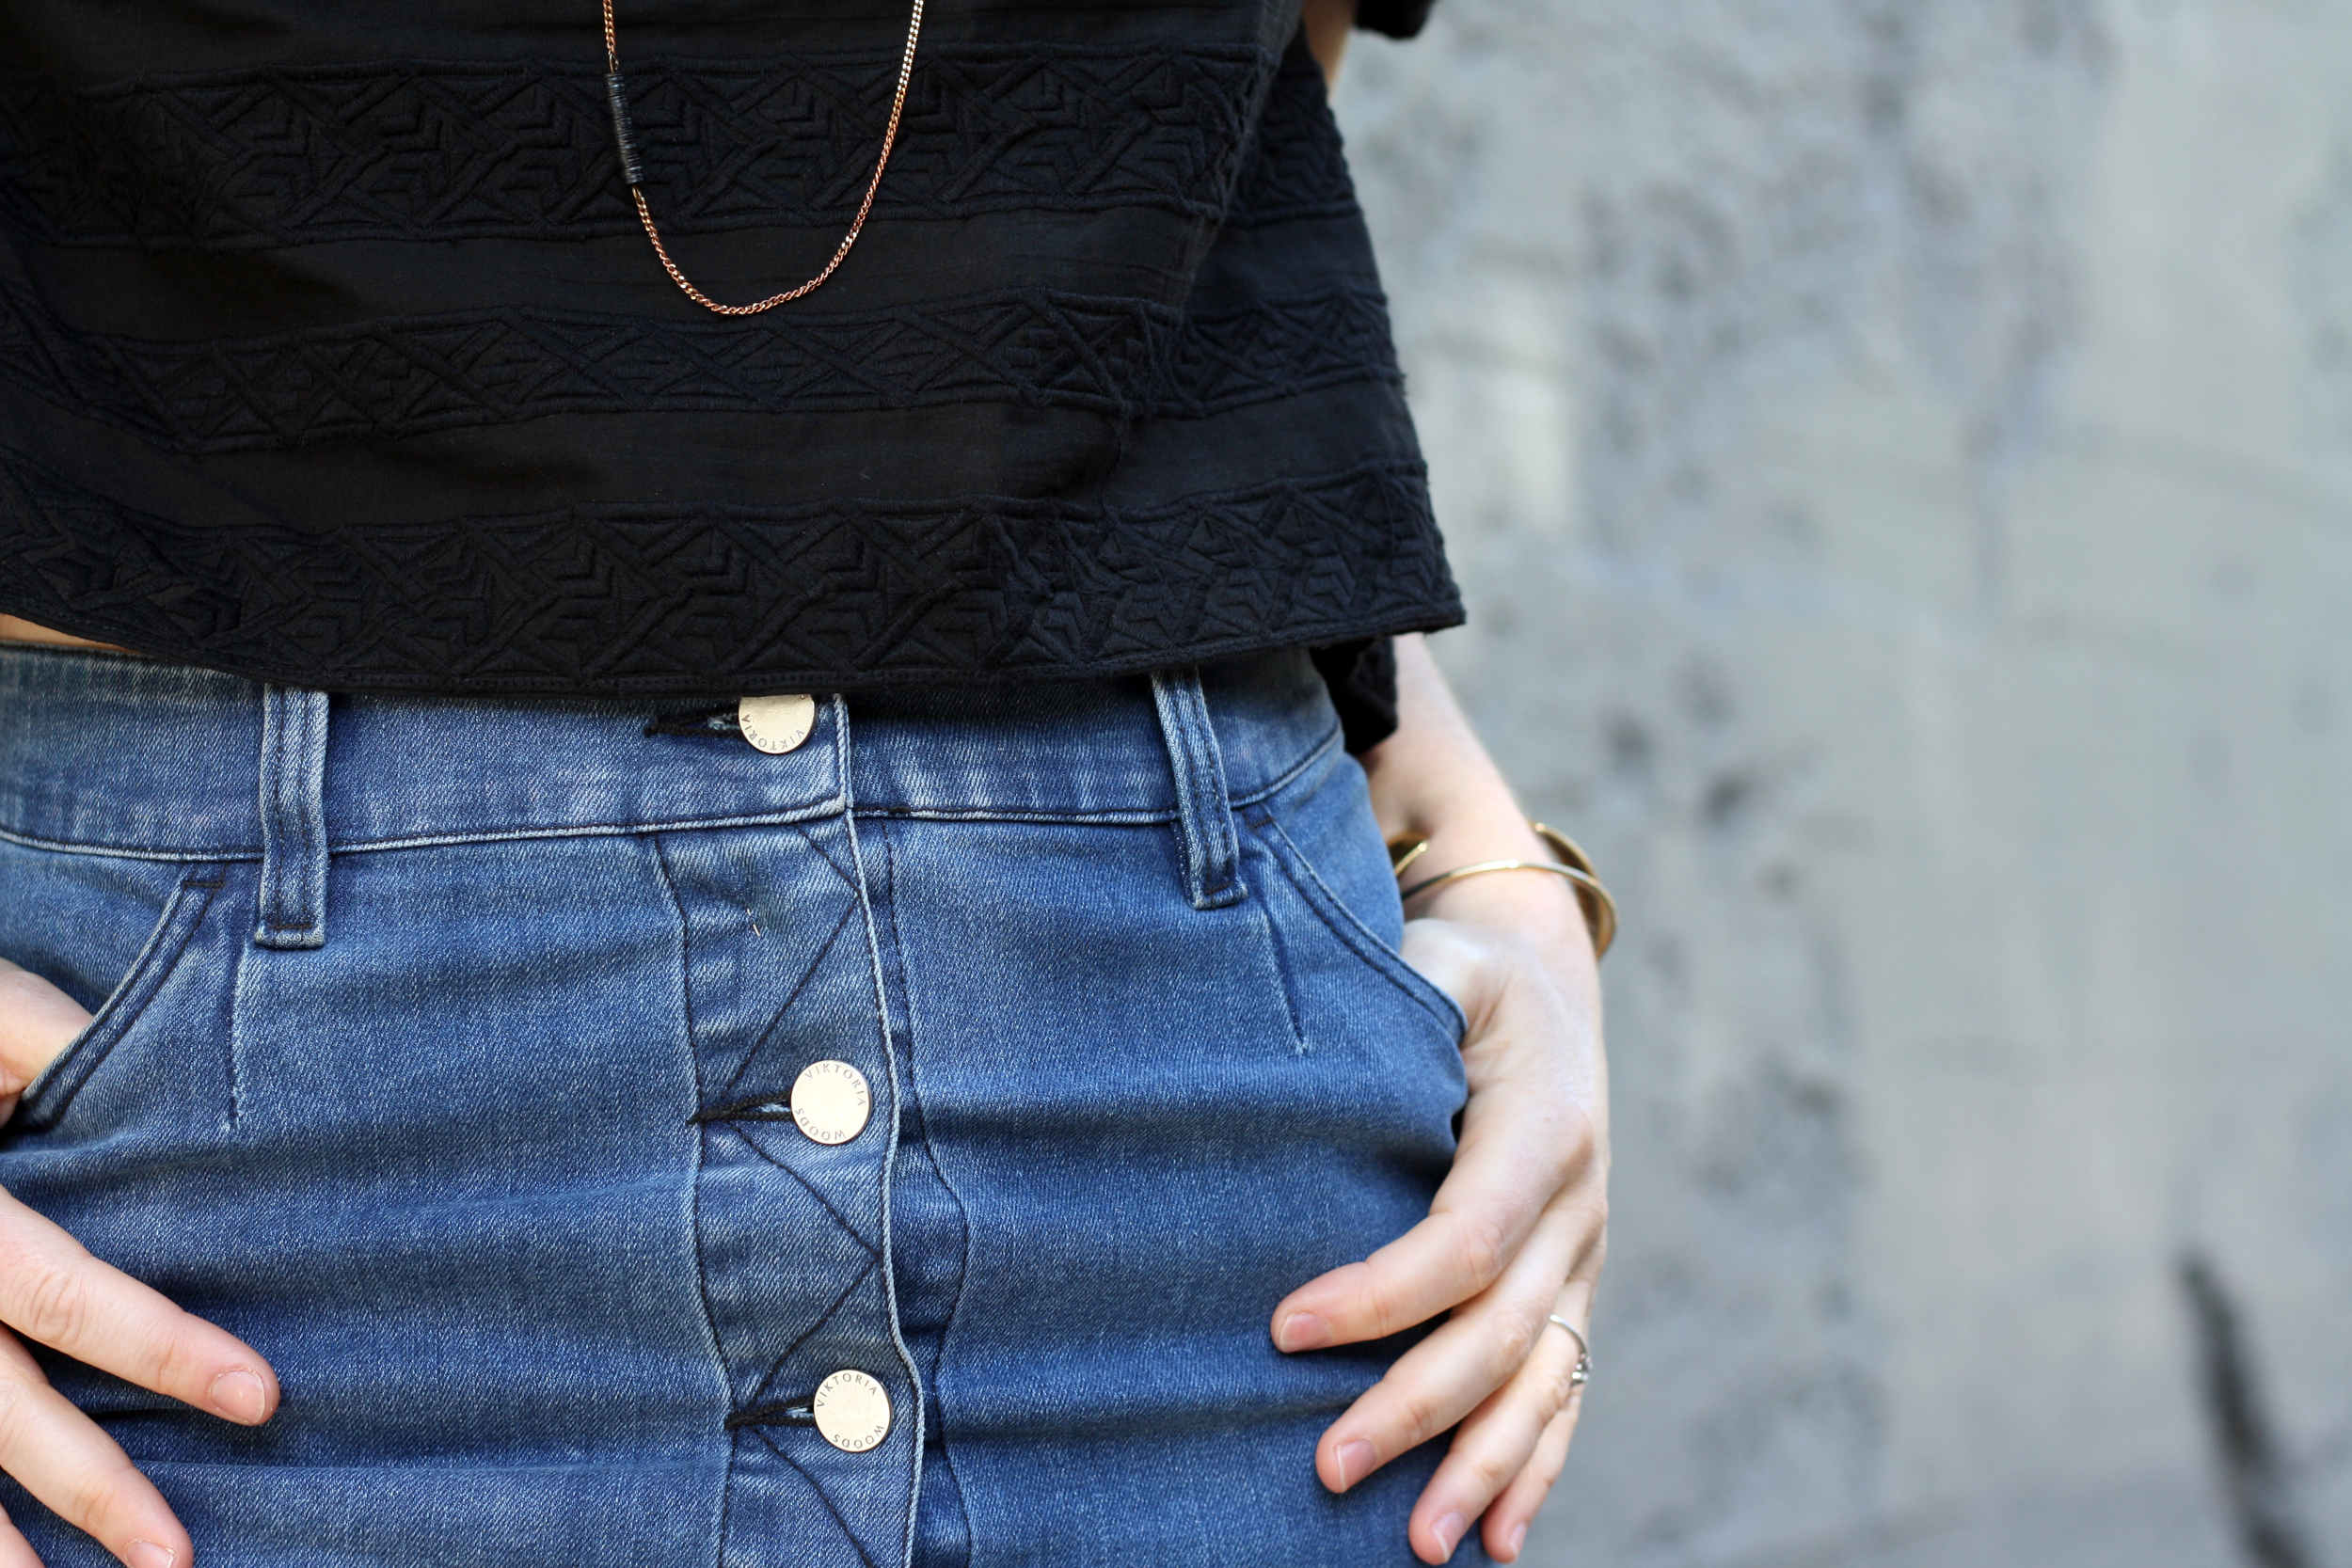
Turns out, all it took to get back in the sewing groove was finding a really easy project. I've been drooling over all of the off the shoulder silhouettes I've seen this season (including the one Sophie paired with her Birkin flairs). And since I couldn't find a similar pattern online, I went the DIY route. I used A Pair and a Spare's tutorial, subbing out basic tube sleeves for a slight flutter shape (Colette's Aster pattern provided a great template), and finally found a use for this embroidered Nanette Lepore cotton I've had sitting in my stash for four years. I intentionally cut it short so I could wear it with this high waisted skirt by Viktoria and Woods, a conscientious Australian brand I recently fell in love with (and bonus: they're accredited by Ethical Clothing Australia).
This top was a ridiculously quick project — it only took me about an hour total — and it inspired me to make more lightweight, breezy pieces for summer. So here's to sunshine, inspiration, and a little extra skin (also pass the SPF please).